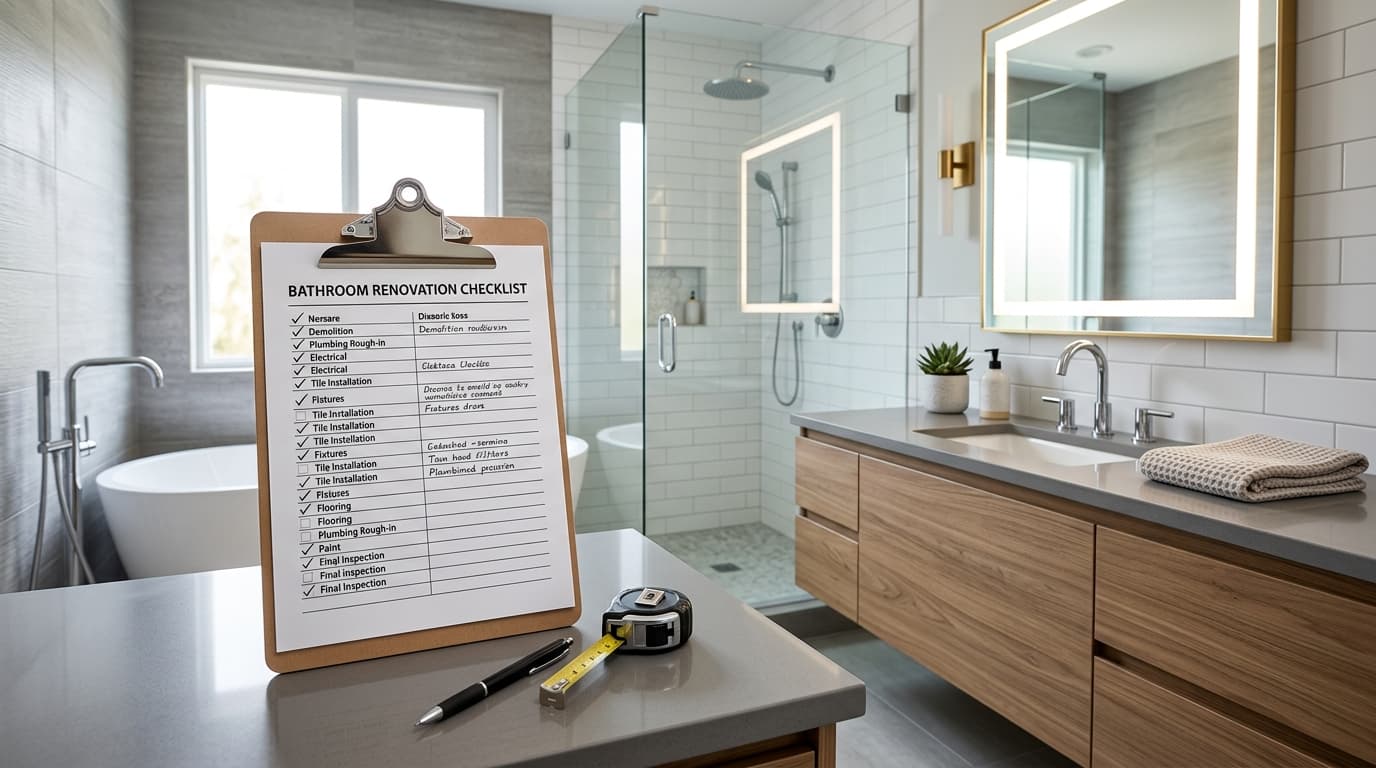
Your outdated bathroom mocks you every morning. The cracked tile, the leaking faucet, the vanity doors that won't close properly. You know you need to renovate, but coordinating 6-8 different trades while managing a budget between $15,000 and $50,000 feels paralyzing. One wrong decision could affect your daily routine for the next decade. This bathroom renovation checklist transforms that complexity into manageable phases.
The right bathroom renovation checklist transforms this complex project into manageable phases. Each phase builds on the previous one, creating momentum instead of overwhelm. You'll know exactly what to do, when to do it, and what to watch out for along the way.
This comprehensive bathroom renovation checklist walks you through every phase, from initial planning through final inspection. You'll learn how to set realistic budgets, find qualified contractors, and avoid the mistakes that derail most bathroom projects.
Phase 1: Planning and Assessment (4-6 Weeks Before Construction)
Setting Your Renovation Goals and Budget
Before browsing Pinterest for inspiration, define what you need versus what you want. You start with a simple vanity upgrade. Six weeks later the scope has tripled and you're $35,000 into a complete overhaul. This happens when you don't establish clear boundaries from the start.
Start by documenting these specifics:
- What problems need solving? (water damage, inadequate storage, poor ventilation)
- Who uses this bathroom and when? (two adults getting ready simultaneously, kids' bath time, guest usage)
- What's your maximum budget including a 20% contingency fund?
- How many days can you manage without this bathroom?
Budget Reality Check: Basic bathroom refreshes (new fixtures, paint, vanity) typically cost $8,000-$15,000. Mid-range renovations with layout changes run $15,000-$30,000. High-end renovations exceed $40,000. According to Remodeling Magazine's 2023 Cost vs. Value Report, bathroom renovations recoup 60-70% of their cost at resale, with midrange projects averaging 67.2% ROI.
Measuring Your Space and Identifying Constraints
Create a detailed floor plan with exact measurements: length, width, ceiling height (standard 8-9 feet), window and door locations, and existing plumbing positions. Professional contractors need these measurements for accurate quotes and material ordering.
Document these constraint factors:
- Plumbing locations: Moving a toilet more than 3 feet from the existing drain adds $2,000-$5,000 to your project (average $3,200 in major metro areas)
- Electrical capacity: Homes built before 1980 often need panel upgrades costing $1,200-$3,500 for modern lighting and ventilation
- Structural elements: Load-bearing walls, floor joists (typically 16 inches on center), and ceiling height limitations
- Building code requirements: Minimum clearances (15 inches from toilet center to wall), ventilation requirements (1 CFM per square foot), and accessibility standards
Determining Your Renovation Scope
Define exactly what's included in your project to prevent scope creep and budget overruns:
Cosmetic Refresh (2-3 weeks, $8,000-$15,000):
- Paint and new fixtures ($800-$2,500)
- Vanity and mirror replacement ($600-$2,000)
- New lighting ($300-$1,200)
- Tile refresh or re-grouting ($500-$1,500)
Standard Renovation (4-6 weeks, $15,000-$30,000):
- New flooring and wall tile (120 square feet average, $1,800-$3,600)
- Tub/shower replacement ($3,000-$6,000)
- Complete electrical and plumbing updates ($2,500-$5,000)
- New vanity and storage solutions ($1,500-$4,000)
Complete Gut Renovation (6-10 weeks, $25,000-$50,000+):
- Layout changes and wall removal ($2,000-$5,000 per wall)
- All new plumbing and electrical ($5,000-$10,000)
- Custom tile work and built-ins ($4,000-$8,000)
- High-end fixtures and finishes ($8,000-$20,000)
Phase 2: Design and Material Selection (3-4 Weeks Before Construction)
Creating Your Design Plan
Function drives design in successful bathroom renovations. Consider your actual daily routine: Do you take baths or only showers? Do two people need to get ready simultaneously? How much do you actually store in your bathroom?
Create a priority hierarchy:
- Must-haves: Essential repairs and functional improvements
- Nice-to-haves: Features that enhance daily use
- Dream features: Luxuries to include if budget allows
Map traffic patterns and usage conflicts. Double sinks mean nothing if there's only 30 inches of counter space (minimum 60 inches recommended). A soaking tub wastes money if you haven't taken a bath in five years.
Selecting Fixtures and Materials
Start with major fixtures and work down to details:
Major Fixtures (Order 6-8 weeks ahead):
- Bathtub or shower system: $800-$5,000+ (acrylic averages $1,200, cast iron $2,500)
- Toilet: $200-$1,500 (dual-flush models average $450)
- Vanity and sink: $500-$3,000+ (36-inch single vanity averages $1,100)
- Faucets and hardware: $200-$1,000+ (widespread faucets average $375)
Tile and Flooring:
- Porcelain tile: $3-$15 per square foot (average $7.50 installed)
- Natural stone: $8-$25 per square foot (marble averages $18 installed)
- Luxury vinyl: $2-$8 per square foot (average $4.50 installed)
- Add 10% extra for cuts and future repairs
Order all materials 2-3 weeks before construction starts. Coordinate delivery timing with your contractor to avoid storage issues or installation delays.
Lighting and Electrical Planning
Layer three types of lighting for optimal function:
- Ambient lighting: General illumination (4-inch recessed fixtures cost $150-$300 each installed)
- Task lighting: Focused grooming light (vanity sconces at eye level, 36-40 inches apart)
- Accent lighting: Decorative elements (LED strip lights average $25 per linear foot)
Electrical code requirements:
- GFCI outlets within 3 feet of water sources (required by NEC Article 210.8)
- Dedicated 20-amp circuit for high-draw appliances
- Exhaust fan rated at minimum 1 CFM per square foot (80 CFM for average bathroom)
- Consider adding USB outlets ($25-$40 each) and dimmer switches ($20-$60 each)
Phase 3: Permits and Contractor Selection (2-3 Weeks Before Construction)
Understanding Permit Requirements
Permits protect you and ensure work meets safety standards. According to the National Association of Home Builders, unpermitted work can reduce home value by 10-15%. You'll typically need permits for:
- Electrical work beyond replacing fixtures ($75-$200)
- Plumbing changes involving supply lines or drains ($50-$300)
- Structural modifications ($100-$500)
- New ventilation systems ($50-$150)
Permit costs range from $100-$500 total, with approval taking 1-3 weeks (average 10 business days). Some contractors include permit handling in their services; others expect homeowners to manage this process. Clarify responsibility before signing contracts.
Finding and Vetting Contractors
The difference between a skilled contractor and a poor one can cost thousands in repairs and months of delays. Get change order procedures in writing before work starts.
Essential vetting steps with specific actions:
- Verify licensing and insurance: Call the insurance company directly using the number on their website (not the certificate) to confirm coverage is active and adequate (minimum $1 million general liability)
- Check recent references: Ask these specific questions:
- "Did the project finish within 10% of the quoted price?"
- "How did they handle unexpected problems?"
- "Would you hire them again for a similar project?"
- Review portfolio: Look for completed bathrooms with similar scope and age of home (within 20 years)
- Get detailed written estimates: Each quote should specify exact product models, labor hours by trade (plumber: 16-24 hours, electrician: 8-12 hours), and change order procedures
Red flags that should end conversations:
- Demands for deposits over 25% (illegal in California, New York, and 8 other states)
- No physical business address you can verify
- Prices 40% higher or lower than other quotes
- Reluctance to provide written change order procedures
For comprehensive guidance on contractor vetting, see our detailed guide on how to find a reliable contractor.
Getting Multiple Quotes and Comparing Bids
Three detailed quotes give you negotiating power and reveal market rates. Create a spreadsheet comparing:
Line items to compare across bids:
- Specific material brands and models (not just "Kohler toilet" but "Kohler K-3987-0")
- Labor costs broken down by trade ($65-$85/hour for plumbers, $70-$90/hour for electricians)
- Timeline with milestone dates
- Payment schedule (typical: 25% deposit, 25% at rough-in, 25% at tile completion, 25% at final)
- Warranty terms (minimum 1 year on labor)
- Who handles permit acquisition
- Cleanup and disposal fees ($300-$800)
Questions that reveal contractor quality:
- "What's your process if we discover mold behind the walls?"
- "How do you protect my home's other rooms during demolition?"
- "What happens to the timeline if ordered materials arrive damaged?"
- "Can you provide photos from a project at the 50% completion mark?"
Phase 4: Pre-Construction Preparation (1 Week Before Start)
Preparing Your Home and Family
The week before demolition requires military-level logistics planning:
Home preparation tasks:
- Empty bathroom completely, including medicine cabinets
- Set up alternative bathroom arrangements with posted schedules
- Seal doorways to adjacent rooms with plastic sheeting (6-mil minimum) and painter's tape
- Move valuables and breakables away from vibration zones (minimum 10 feet)
- Document existing conditions with dated photos from multiple angles
Family survival strategies:
- Create shower schedules that prevent morning conflicts (allow 25 minutes per person)
- Stock portable hygiene supplies (wet wipes, dry shampoo, hand sanitizer)
- Arrange sleepovers during the loudest demolition days (typically days 1-3)
- Prepare children for disruption with specific expectations
Final Material Delivery and Storage
Coordinate deliveries to arrive 2-3 days before needed. Earlier deliveries risk damage; later deliveries cause expensive delays averaging $400 per day in labor costs.
Storage logistics:
- Tile boxes must stay flat and dry (garage floors or spare bedrooms)
- Keep fixtures in original packaging until installation day
- Create a binder for all warranties and instruction manuals
- Photograph serial numbers before installation
Delivery day protocol:
- Schedule someone to be home for all deliveries
- Open and inspect every box immediately
- Document any damage with photos before signing
- Report issues to suppliers within 24 hours
Setting Up Communication Protocols
Establish these specific communication agreements:
- Daily 7:30 AM check-in on day's goals
- 4:00 PM progress update via text with photos
- 24-hour notice for any decisions needed
- Emergency contact order (contractor cell, then office, then project manager)
- Weekly video walkthrough every Friday
Phase 5: Construction Phase Management (4-8 Weeks)
Week 1: Demolition and Rough-In Work
The first week brings maximum disruption but also rapid visible progress:
Week 1 activities:
- Remove all existing fixtures and finishes (8-12 hours)
- Expose plumbing and electrical systems (4-6 hours)
- Address discovered issues (rot, outdated wiring, asbestos)
- Install new rough plumbing and electrical (16-24 hours combined)
- Frame any structural changes (8-16 hours per wall)
What's normal vs. concerning:
- Normal: Dust despite containment, minor wall cracks from vibration (hairline cracks under 1/16 inch)
- Concerning: Structural damage beyond the bathroom, evidence of active leaks
Discoveries during demolition often require quick decisions. That galvanized plumbing might need complete replacement, adding $2,000-$4,000 to your budget (average $2,800 for 1950s homes). Address these issues now rather than patching problems that will resurface.
Week 2-3: Infrastructure and Waterproofing
These weeks focus on systems that prevent future disasters:
Critical installations:
- Complete rough plumbing with pressure testing (must hold 50 PSI for 15 minutes)
- Finish electrical rough-in with proper GFCI protection
- Install waterproofing systems (minimum 3 coats, 48-hour cure time)
- Pass rough inspections (schedule 3 days in advance)
- Install backing for heavy fixtures (2x10 minimum for grab bars)
Quality checkpoints you can verify:
- Shower pan holds water for 24 hours without dropping (mark water level with tape)
- All electrical boxes are secured and level (use 4-foot level)
- Waterproofing extends 6 inches beyond wet areas
- Insulation fills all exterior wall cavities (R-13 minimum)
Poor waterproofing causes most bathroom failures within 5 years. According to the Tile Council of North America, proper waterproofing prevents 95% of moisture-related failures.
Week 4-6: Tile Work and Major Installations
Visual transformation accelerates as finishes go in:
Installation sequence:
- Set all tile work starting with floors (24-48 hours including drying)
- Install tub or shower unit (4-8 hours)
- Mount vanity and countertops (3-5 hours)
- Connect plumbing fixtures (6-10 hours)
- Install lighting and ventilation (4-6 hours)
Quality indicators to monitor:
- Consistent grout lines (variance under 1/16 inch, use spacers)
- Proper slope to drains (1/4 inch per foot minimum, test with marble)
- Secure fixture mounting (no wobbles or gaps exceeding 1/8 inch)
- Smooth fixture operation (faucets, drains, shower controls)
Rushing tile work guarantees future problems. Quality installers maintain consistent spacing and take time for precise cuts around fixtures.
Week 7-8: Finishing Work and Final Details
Final weeks transform construction zone into finished bathroom:
Completion activities:
- Install all electrical fixtures and switch plates (2-4 hours)
- Complete final plumbing connections (3-5 hours)
- Mount mirrors, towel bars, and accessories (2-3 hours)
- Apply final caulk and paint touch-ups (4-6 hours)
- Deep clean all surfaces (3-4 hours)
Pre-payment inspection points:
- Water runs hot and cold at appropriate pressure (50-80 PSI)
- All drains flow freely (tub should empty in under 3 minutes)
- Electrical fixtures operate on correct switches
- Caulk lines are smooth and complete (no gaps over 1/16 inch)
- No construction debris remains
Phase 6: Final Inspections and Project Completion
Quality Control and Walk-Through
Your final walk-through determines whether work meets contract standards. Bring your contract, original scope of work, and this bathroom renovation checklist.
Systematic inspection process:
- Run every faucet for 5 minutes checking for leaks (check under cabinets with flashlight)
- Test all electrical components multiple times (minimum 10 on/off cycles)
- Push on all tiles checking for loose pieces (hollow sound indicates poor adhesion)
- Examine all caulk lines for gaps or inconsistencies
- Verify accessories are level and secure (within 1/8 inch)
Common punch list items:
- Incomplete caulking around fixtures
- Paint touch-ups needed
- Grout haze on tile surfaces
- Loose cabinet hardware
- Missing outlet covers
Document all issues with photos and create a written punch list. Withhold 10% of final payment until all items are resolved.
Obtaining Final Permits and Approvals
Schedule final inspections immediately upon completion:
Required inspections:
- Electrical final (all new circuits and fixtures)
- Plumbing final (supply and drain modifications)
- Building final (structural and ventilation changes)
Failed inspections require prompt correction. Your contractor should handle all corrections without additional charges if the work scope hasn't changed. Average correction time: 2-3 days.
Warranty and Maintenance Information
Organize all documentation before making final payment:
Essential documents to collect:
- Manufacturer warranties for every fixture
- Contractor's written warranty (typically 1-2 years)
- Paint colors with brand and finish (example: "Benjamin Moore Cloud White OC-130, Eggshell")
- Tile specifications for future matching (lot numbers critical)
- Maintenance schedules for ventilation and fixtures
Typical warranty coverage:
- Fixtures: 1-5 years on parts, limited lifetime on some finishes
- Contractor labor: 1-2 years on installation
- Tile materials: Defects only, not installation
- Waterproofing: 5-10 years if properly documented
Avoiding Common Bathroom Renovation Mistakes
Budget and Timeline Pitfalls
Learning from common mistakes saves money and frustration:
Expensive errors with real costs:
- Skipping contingency funds: Unexpected issues occur in most bathroom renovations, averaging $3,400 in additional costs
- Mid-project changes: Each change order adds 10-30% to affected work areas (average $850 per change)
- Choosing trendy over classic: Dated designs can reduce home value by $5,000-$10,000
- Avoiding permits: Unpermitted work can void insurance claims and complicate home sales (disclosure required in 42 states)
Realistic timeline expectations:
- Simple renovations: Plan for 4 weeks (not the quoted 2 weeks)
- Standard renovations: Plan for 8 weeks (not the quoted 4-6 weeks)
- Complex renovations: Plan for 12 weeks (not the quoted 6-8 weeks)
Material delays, inspection schedules, and weather all impact timelines. Build 25% time buffer into your planning.
Material and Design Mistakes
Avoid these selection errors that cause long-term regret:
Functional failures:
- Inadequate storage (you need 20% more than you think - minimum 24 inches of drawer space per user)
- Single ceiling light creating shadows at mirror
- Undersized exhaust fan causing moisture damage ($2,000-$5,000 in repairs within 5 years)
- Choosing form over function for daily-use items
Material missteps:
- Natural stone in high-moisture areas without proper sealing (requires resealing every 6-12 months)
- Glossy tiles on floors creating slip hazards (coefficient of friction should exceed 0.60)
- Too many materials creating visual chaos (limit to 3-4 material types)
- Fixtures sized from photos without measuring actual space
Live with your choices for years. Select based on actual use patterns, not showroom appeal.
Ready to Start Your Bathroom Renovation?
Homeplexi connects you with licensed, vetted contractors who specialize in bathroom renovations. Compare quotes, read reviews, and manage your entire project in one place.
Find trusted bathroom contractors in your area →
Frequently Asked Questions
How long does a bathroom renovation take?
Most bathroom renovations take 4-8 weeks of active construction. Simple updates need 2-3 weeks, while gut renovations extend to 10-12 weeks. Add 2-4 weeks to any contractor estimate for realistic planning.
What permits do I need for a bathroom renovation?
Permits are required for electrical work (new circuits), plumbing changes (moving fixtures), structural modifications (removing walls), and new ventilation systems. Costs range from $100-$500 with 1-3 week approval times (average 10 business days). Always consult your local building department for specific requirements.
How much should I budget for unexpected issues?
Reserve 20-30% above your base budget for surprises. Common discoveries include outdated electrical systems ($1,500-$3,000), corroded plumbing ($1,000-$4,000), and water-damaged subfloors ($500-$2,500). Older homes (pre-1970) typically need 30% contingencies, while newer homes (post-1990) can plan for 20%.
Should I stay in my home during renovation?
Single-bathroom homes require creative solutions or temporary relocation during weeks 1-2. Multiple bathroom homes allow staying with careful scheduling. Consider family dynamics, work schedules, and tolerance for disruption when deciding.
When should I order materials?
Order major fixtures 6-8 weeks before construction. Schedule all deliveries for 2-3 days before installation. This prevents storage problems while avoiding project delays. Confirm lead times have increased since COVID; some fixtures now require 12-16 weeks (especially custom vanities and specialty tiles).
Related Articles:
- How to Find a Reliable Contractor: Your Complete Guide to Avoiding Scams and Hiring with Confidence
- How to Evaluate Home Improvement Work Quality: A Homeowner's Guide to Realistic Standards and Red Flags
- The Complete Home Renovation Cost Estimator Guide: Budget Like a Pro in 2026
- Essential Questions to Ask Contractors Before Hiring: Your Complete Vetting Guide
Need Professional Help?
Homeplexi connects you with vetted contractors, helps you compare quotes, and manages your entire home improvement project in one place.
Get Started Free →The Homeplexi editorial team consists of licensed contractors, home inspectors, and consumer protection experts who provide research-backed guidance for homeowners. All content is fact-checked and cited from authoritative industry sources.
Important Safety Disclaimer
Please read this carefully before following any advice:
- Always prioritize safety: Wear appropriate protective equipment (safety glasses, gloves, etc.) when performing any home maintenance or repair work.
- Know your limits: If you're not confident in your ability to safely complete a task, hire a licensed professional. This is especially important for electrical, gas, plumbing, and structural work.
- Verify all information: The guidance provided here is based on community discussions and general knowledge. Always double-check any advice with multiple reliable sources or a licensed professional.
- Follow local codes: Building codes, electrical codes, and plumbing codes vary by location. Ensure any work complies with your local regulations and obtain necessary permits.
- Turn off power/water/gas: Before working on electrical, plumbing, or gas systems, always shut off the relevant utilities at the source.
- For emergencies: If you have a gas leak, electrical fire, major water leak, or other emergency, evacuate immediately and call emergency services (911) and your utility company.
Liability: Homeplexi provides information for educational purposes only. We are not responsible for any injury, property damage, or losses resulting from following any guidance or advice provided through this platform. Use all information at your own risk.
When in doubt, always consult a licensed, insured professional contractor. Homeplexi can help you find qualified professionals in your area.
Found this helpful? Share with others: