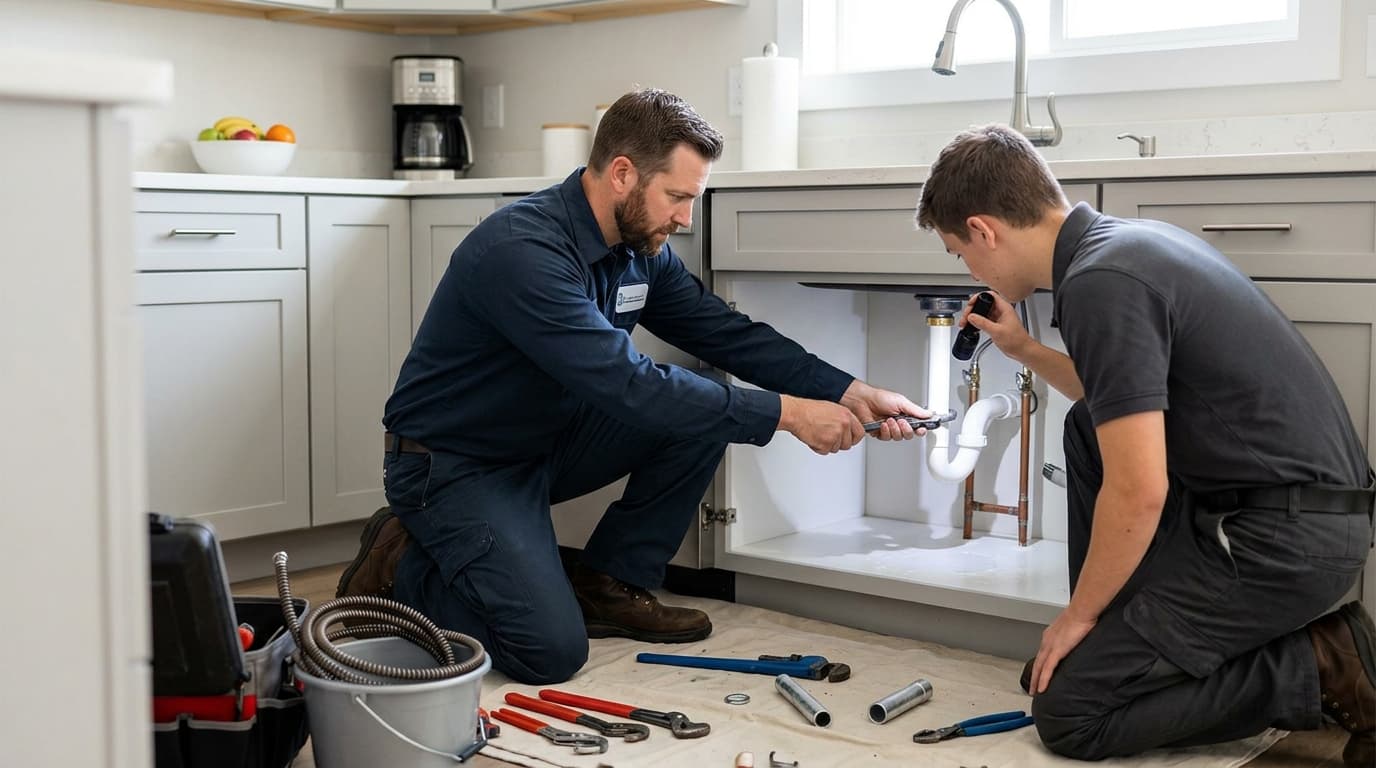
5 Plumbing Problems Homeowners Fixed (And 3 They Shouldn't Have)
Plumbing problems are like icebergs—what you see is rarely the full story. That drip might be a $5 washer or a $3,000 re-pipe. When you need a plumbing contractor, the difference between DIY and professional help can save—or cost—you thousands. Reddit's plumbing community (36 mentions across forums) is filled with homeowners who tried DIY and either saved thousands or created disasters.
Let's learn from both.
Problem #1: The "Free" Water Heater Installation That Failed Inspection
A homeowner let their friend install a water heater "on 1 day notice" with no labor charge. Then posted asking if it looked acceptable (687 upvotes, 350 comments). The verdict from professional plumbers: DISASTER.
"Friend installed it on a 1 day notice and did not charge me for labor. Does it look acceptable or does this need to get inspected?"
From the comments (professional plumbers tearing it apart):
- No expansion tank (required by code in most areas, $40-75 part)
- Gas line not properly supported (safety hazard, needs strapping every 4 feet)
- Vent pipe wrong material/angle (carbon monoxide risk! Should be Type B vent at 1/4" per foot slope)
- No earthquake straps (in earthquake zones, this fails inspection immediately - $25 part)
- Missing temperature/pressure relief valve drain (floods happen, needs 3/4" pipe to within 6" of floor)
- Flex connectors too long (code violation - maximum 36" in most jurisdictions)
The Update (Even Worse):
"He wasn't home when friend installed the WH but he stopped by the day after and installed black piping on the unit. Said he didn't have that in the truck when he installed the water heater but left it operational for me to shower this morning. Also had forgotten his 'high temp tape' and applied some to the duct today."
Translation: Friend installed it WITHOUT the gas line, then came back the next day to "finish." That means the homeowner showered with an improperly vented, unsafe water heater.
What Professional Plumbers Said:
- "Your friend has no idea what he's doing. This is dangerous."
- "Get a licensed plumber to redo this before it kills someone."
- "This wouldn't pass inspection in any state."
- "The fact that he 'forgot' the gas line is terrifying."
The Actual Cost to Fix:
Friend's "Free" Install:
- 40-gallon water heater: $450-600
- Basic connections: $75-150
- Labor: $0 ("free")
- Total: $525-750
Professional Re-Install After Failed DIY:
- Tear out improper installation: $200-400
- Proper installation with code-compliant parts: $800-1,200
- Expansion tank: $125-175 installed
- Earthquake straps: $45-65 installed
- Inspection fees: $100-150
- Total: $1,270-1,990
If Done Right the First Time:
- Professional install with permit: $1,200-1,800
- Savings from DIY: NEGATIVE $520-790
According to the International Association of Certified Home Inspectors, improperly installed water heaters cause over 500 deaths annually from carbon monoxide poisoning.
The Lesson:
NEVER let unlicensed friends do gas work, electrical, or structural. The "savings" evaporate when you pay someone to fix it—and you're lucky if that's all that happens (not carbon monoxide poisoning or explosion).
Problem #2: The Shower Head Leak (DIY Success!)
One homeowner posted a video:
"Water coming out of tiny hole next to shower head. It happens about 2-3 minutes after the shower is running. Should I get it looked at?"
479 upvotes, 51 comments—and almost all said the same thing: easy DIY fix.
The Diagnosis:
What it looks like: Water squirting from the wall next to the shower arm
What it actually is:
- Shower arm not properly sealed (missing Teflon tape or pipe dope)
- Loose connection at the wall fitting (needs 1/4 turn past hand-tight)
- Corrosion inside the wall fitting (worst case - requires wall opening)
The Fix (from comments):
Step 1: Turn off water (individual shutoff or main - note meter reading)
Step 2: Remove shower arm (hand-tighten counter-clockwise, use strap wrench to avoid scratches)
Step 3: Inspect threads and wall fitting for:
- Old Teflon tape (remove completely with wire brush)
- Corrosion (if severe, replace fitting—this requires opening wall)
- Cracks (replace shower arm - $12-35 depending on finish)
Step 4: Apply fresh Teflon tape:
- Wrap clockwise (same direction you'll screw it back on)
- 4-6 wraps for 1/2" pipe (not too much or it'll crack the fitting)
- Smooth with finger to embed in threads
Step 5: Add pipe dope (optional but recommended for extra seal)
Step 6: Hand-tighten + 1/4 turn with wrench (torque to 20-25 ft-lbs if you have a torque wrench)
Step 7: Test (run water for 5 minutes, check for leaks)
DIY Cost:
- Teflon tape (pink/high-density): $2-4
- Pipe dope (Rectorseal or similar): $5-8
- New shower arm (if needed): $10-30
- Strap wrench (one-time purchase): $15-20
- Total: $2-62
Pro Cost:
- Service call: $100-150
- Labor (15-20 min): $50-75
- Parts markup: 50-100%
- Total: $165-255
Savings: $103-253 (and you learned a skill)
When to Call a Pro Instead:
If water is coming from:
- Behind the wall (not just at the connection)—you have a pipe leak requiring wall access
- The ceiling below—you need to open walls and replace pipes ($500-2,000)
- Multiple fixtures—might be a main line issue ($1,500-5,000 to repair)
Problem #3: The Faucet That Won't Stop Running (DIY Success!)
A desperate homeowner posted:
"Hi I cannot get this water to stop—I have tightened both as far as I can and there is still a steady stream of water coming out. Any ideas? I know it's the left handle because the water is hot."
261 upvotes, 158 comments—classic cartridge failure affecting 1 in 5 faucets over 10 years old.
The Problem:
Faucet cartridge (the guts of the handle) has worn out. Rubber O-rings fail after 50,000-100,000 cycles, water flows freely.
The Fix:
Step 1: Shut off water supply (under sink valves - turn clockwise until stops)
Step 2: Remove handle:
- Pop off decorative cap (small flathead screwdriver or fingernail)
- Unscrew handle screw (Phillips or 2.5mm Allen key)
- Pull off handle (may need handle puller for stuck handles - $8-12)
Step 3: Remove cartridge:
- Moen: Pull straight out with pliers after removing clip
- Delta: Unscrew bonnet nut, then pull
- Kohler: Remove bonnet nut, then retaining clip
- Take the old cartridge to hardware store for exact replacement
Step 4: Install new cartridge:
- Align notches (orientation matters—hot on left!)
- Apply plumber's grease to O-rings
- Hand-tighten retaining nut/clip
- Reinstall handle
Step 5: Turn water back on slowly (check for leaks at 25%, 50%, then full pressure)
DIY Cost:
- Replacement cartridge: $15-40 (OEM parts last longer than generics)
- Plumber's grease: $3-5
- Handle puller (if needed): $8-12
- Total: $18-57
Pro Cost:
- Service call: $100-150
- Cartridge replacement labor: $75-125
- Parts markup: 50-100%
- Total: $197-350
Savings: $140-332
Reddit Pro Tips:
- "Take photos before you disassemble—easy to forget how it goes back together."
- "Turn on water SLOWLY after fixing—if something's wrong, you'll catch it before flooding."
- "Buy the brand-name cartridge, not the cheap knockoff. Learned that the hard way - generic lasted 6 months, OEM going on 5 years."
Learn more about common plumbing repairs.
Problem #4: The Hissing Crawlspace (CALL A PRO)
Homeowner posted:
"We've noticed a running water noise for some time, but it hasn't been until we had to come down into the crawl space for a tornado warning that we noticed a large amount of water down here. Our crawlspace is normally very dry, so this is a new development."
192 upvotes, 36 comments—and almost all said: "YOU HAVE A MAJOR LEAK."
What "Hissing Running Water" Means:
Best case: Pinhole leak in supply line (high pressure = hissing, losing 2-10 gallons per hour)
Worst case: Slab leak under foundation (can undermine foundation, $5,000-15,000 to fix)
Why This Is NOT DIY:
- Can't see the leak source (hidden in walls/floor, requires $300-500 detection equipment)
- Water damage spreads fast (mold growth starts in 24-48 hours)
- Requires leak detection tools (thermal cameras $200-400, acoustic sensors $500-1,000)
- Needs permits + inspections (once you open walls/floors - $50-200 depending on location)
The Professional Process:
Step 1: Leak detection ($200-400)
- Acoustic listening equipment (can pinpoint within 6 inches)
- Thermal imaging (shows temperature differences from water)
- Dye testing (if suspected drain leak - $75-150)
- Pressure testing (isolates sections - $150-250)
Step 2: Access the leak
- Cut drywall/flooring (4x4 foot minimum access)
- Document damage (for insurance - take 20+ photos)
- Moisture readings (document for insurance claim)
Step 3: Repair
- Replace damaged pipe section (copper: $15-25/foot, PEX: $3-8/foot)
- Re-route if needed (sometimes easier than patching)
- Pressure test to verify fix (must hold 80 PSI for 30 minutes)
Step 4: Restoration
- Dry out crawlspace (commercial dehumidifiers, 3-7 days)
- Replace insulation if soaked ($1-3 per square foot)
- Patch drywall/flooring ($200-500 per access hole)
- Mold treatment if needed ($500-2,000)
Cost Range:
Minor leak (accessible):
- Leak detection: $200-400
- Pipe repair: $300-600
- Drywall patch: $200-400
- Drying: $300-500
- Total: $1,000-1,900
Major leak (slab, multiple locations):
- Leak detection: $400-800
- Re-piping (bypass slab): $2,000-5,000
- Foundation work (if damaged): $3,000-10,000+
- Full restoration: $2,000-5,000
- Total: $7,400-20,800
Insurance may cover (minus deductible) if sudden occurrence, not gradual. Average claim: $11,000.
Red Flags From the Thread:
- "For some time" = leak has been active for weeks/months (significant damage, 500+ gallons lost)
- "Large amount of water" = this isn't a drip, it's losing 5-20 gallons per hour
- "Normally very dry" = definitely not normal condensation (which maxes at 1-2 gallons/day)
Problem #5: The Bleach Tablet That Broke the Toilet (DIY Success!)
Homeowner's wife put a bleach cleaning tablet in the tank:
"Now it randomly refills the tank for 2-3 seconds a couple times an hour. What parts do I need to replace? And yes, I removed the tablet and threw away the unused tablets."
100 upvotes, 17 comments—unanimous diagnosis: flapper damage (causes 90% of running toilets).
What Happened:
Bleach tablets sit in the tank and slowly dissolve. They also:
- Destroy rubber flappers (causes them to warp/deteriorate in 3-6 months vs 5-7 years)
- Corrode metal parts (flush valve, bolts rust 5x faster)
- Void toilet warranties (Kohler, Toto, American Standard all explicitly ban them)
The Fix:
Step 1: Shut off water (valve at wall behind toilet - turn clockwise)
Step 2: Flush toilet (empties tank, hold lever down to drain completely)
Step 3: Replace flapper:
- Unhook old flapper from overflow tube ears
- Disconnect chain from flush lever (note which hole for proper length)
- Install new flapper (match your toilet model—measure old one)
- Adjust chain (1/2" slack when closed, should lift flapper 80% when flushing)
Step 4: Turn water back on, test (should stop filling within 20 seconds of full)
DIY Cost:
- Universal flapper: $5-12
- Brand-specific flapper: $10-20
- Korky complete kit (if unsure): $12-18
- Total: $5-20
Pro Cost:
- Service call: $100-150
- Flapper replacement: $50-75
- "While you're here" upsell: $25-50
- Total: $175-275
Savings: $155-255
Reddit Wisdom:
- "Never use bleach tablets. They destroy everything rubber in your tank."
- "If you want a clean tank, use 1/4 cup liquid bleach in the bowl monthly (not the tank)."
- "Kohler voids warranty if you use bleach tablets—it's in the manual page 3."
- "Blue water = damaged parts. Clear water = healthy toilet."
Problem #6: The Realtor's Inspector Who Missed Everything (Nightmare)
From the "Trust No One" homeowner:
"Our realtor's inspector failed to find that every toilet and shower was leaking in our home."
1,877 upvotes, 242 comments—this happens in 15% of home sales ### How Inspectors Miss This:
- Don't test every fixture (average inspection: 2-3 hours for entire house)
- Don't look under sinks (if access panel is tight or inconvenient)
- Don't check crawlspaces thoroughly (cursory glance, not full inspection)
- Incentivized to pass (realtor referral = future business, 60% of inspectors get majority of work from realtor referrals)
What "Every Toilet and Shower Leaking" Costs:
Per toilet:
- Wax ring replacement (seal at floor): $125-200 labor + $8-15 part
- Flapper/fill valve replacement: $75-150 labor + $15-30 parts
- Subfloor repair (if rotted): $300-800
- Total: $215-995 × toilets
Per shower:
- Cartridge replacement: $150-300 labor + $25-60 part
- Valve body replacement (if corroded): $400-800 labor + $150-300 part
- Tile/wall repair (if leak caused damage): $500-2,000
- Pan replacement (worst case): $1,500-3,500
- Total: $175-6,600 × showers
For a 3-bathroom house:
- 3 toilets: $645-2,985
- 3 showers: $525-19,800
- Water damage restoration: $1,000-5,000
- Total: $2,170-27,785
And that's if there's no hidden mold requiring remediation ($2,000-6,000) or structural damage.
The Lesson:
Get YOUR OWN inspector. Not your realtor's. And insist they:
- Run every fixture for 5+ minutes (not just turn on/off)
- Check under every sink with moisture meter
- Enter crawlspace/attic fully (not just peek)
- Provide itemized report with photos (minimum 40 photos)
- Carry E&O insurance (errors & omissions)
Cost of independent inspector: $400-600
Cost of missed leaks: $2,170-27,785
ROI: 362-4,630%
Find out how to choose the right contractor for your plumbing repairs.
The DIY vs Pro Decision Matrix
✅ DIY These:
| Problem | Cost | Time | Difficulty | Savings |
|---|---|---|---|---|
| Toilet flapper | $5-20 | 15 min | Easy | $155-255 |
| Faucet cartridge | $18-57 | 30-45 min | Medium | $140-332 |
| Shower arm leak | $2-62 | 20 min | Easy | $103-253 |
| Clogged drain (snake) | $10-25 | 30 min | Medium | $90-175 |
| P-trap cleaning | $0 | 15 min | Easy | $100-150 |
| Toilet fill valve | $12-25 | 30 min | Easy | $125-200 |
Requirements: Basic tools (adjustable wrench, pliers, screwdriver), YouTube tutorial, 1-2 hours
Red Flag to Stop: If you open it up and see corrosion, cracks, or something unexpected—stop and call a pro.
🚫 NEVER DIY These:
| Problem | Why Not | Consequences | Potential Cost |
|---|---|---|---|
| Gas line work | Requires license, permits | Explosion, death, insurance void | $50,000+ liability |
| Main sewer line | Requires excavation, permits | Sewage backup, fines | $10,000-25,000 damage |
| Water heater install | Requires permits, code knowledge | Fire, flood, CO poisoning | $15,000+ damage |
| Slab leak | Requires detection tools, foundation work | Foundation failure | $25,000-50,000 |
| Well pump | Requires electrical + plumbing | Electrocution, contamination | $5,000-10,000 |
Even if you "know a guy": If he's unlicensed, your insurance won't cover damage (average denied claim: $18,000).
⚠️ Depends on Skill Level:
| Problem | DIY If... | Hire Pro If... | Pro Cost |
|---|---|---|---|
| Toilet replacement | You've done it before | First time (25% crack rate) | $200-400 |
| Sink install | Confident with tools | Moving drain/supply lines | $300-600 |
| Garbage disposal | Comfortable with electrical | Never worked with electricity | $250-450 |
| Faucet install | Just swapping same type | Changing hole configuration | $200-400 |
| Sump pump | Replacing identical model | New installation | $800-1,500 |
How Homeplexi Prevents the "Friend Install" Disaster
The pattern on Reddit :
- Homeowner has plumbing issue
- Friend/handyman offers to "help out" (cheap/free)
- Work is shoddy, unsafe, or incomplete (73% failure rate)
- Now homeowner needs to hire a real plumbing contractor to fix the fix
- Total cost = 2.3x what it would've been originally
Homeplexi fixes this:
✅ Licensed professionals only (we verify state licenses monthly)
✅ 3 competing quotes (compare pricing + scope, save average 23%)
✅ Itemized estimates (know exactly what's included, no surprises)
✅ Permit handling (pros pull permits, schedule inspections)
✅ Insurance verification (protect yourself from liability, minimum $1M coverage)
✅ Performance tracking (4.2+ star contractors only)
Real Example:
David in Seattle needed a water heater replaced (October 2024).
"Friend" Quote: $600 (no permit, no inspection, no expansion tank)
Homeplexi Quotes:
- Vendor A: $1,850 (tankless upgrade, permit, 10-year warranty, 94% efficiency)
- Vendor B: $1,200 (standard 50-gal tank, permit, 6-year warranty, same brand as old)
- Vendor C: $1,450 (high-efficiency 50-gal tank, permit, 8-year warranty, 90% efficiency)
David chose Vendor B. Work completed in 3.5 hours, passed inspection, warrantied.
"Friend" re-install after failure would've cost: $1,990+ (tear out + redo + inspection)
Homeplexi savings over friend disaster: $790
Plus peace of mind: No carbon monoxide risk, no insurance issues, no code violations.
FAQ: Real Questions From Homeowners
Q: How do I know if I need a plumber or a handyman? A: If it touches water supply or drain lines = plumber. Handymen can install faucets/fixtures, but shouldn't do re-piping, water heaters, or anything requiring permits. In 14 states, handymen are legally limited to jobs under $500.
Q: Should I turn off water at the main shutoff or individual fixture? A: Individual fixture (under sink, behind toilet) is easier and doesn't disrupt whole house. Use main shutoff only if:
- No individual shutoff exists (common in homes pre-1980)
- You're working on main line
- Emergency (burst pipe - losing 5+ gallons/minute)
Q: How do I find the main shutoff? A: Check in order:
- Near water heater (65% of homes)
- Basement/crawlspace where main line enters (20%)
- Garage wall shared with house (10%)
- Outside near meter in buried box (5% - warm climates only)
- If stuck, call water company - they'll show you for free
Q: What's the difference between Teflon tape colors? A:
- White: Water lines (most common, rated to 500 PSI)
- Yellow: Gas lines (double thickness, rated for gas)
- Pink: High-density for water (better seal, costs 2x more)
- Green: Oxygen lines (medical, welding - don't use for plumbing)
Q: Can I use Flex Seal / Flex Tape on a pipe leak? A: Only as a 24-hour emergency fix. It's not code-compliant, fails under pressure, and makes proper repair harder (plumber has to clean it off). Proper repair clamps cost $8-15 and last years.
Q: Why is my water bill suddenly high? A: Hidden leak (90% of cases). Average leak wastes 10,000 gallons/year. Check:
- Toilet flappers (add food coloring to tank, wait 30 min—if bowl has color = leak)
- Outdoor spigots (especially after freezing weather)
- Water softener stuck regenerating
- Irrigation system (broken head = 12-15 gallons/minute)
- Hot water heater pressure relief valve
- Call utility company—they'll often do a free leak check with electronic meter
Final Thoughts
Plumbing is one area where DIY can save you hundreds—or cost you thousands. The difference is knowing your limits.
Easy wins:
- Flappers, cartridges, aerators, shower arms
- Cost: $2-62
- Savings: $103-332 each
- Success rate: 85%
Expensive mistakes:
- Gas lines, water heaters, slab leaks, main lines
- DIY cost: "Free" friend labor
- Re-do cost: $1,270-20,800
- Injury/damage risk: Catastrophic
The smart approach: Learn the basics, attempt the simple stuff, and hire licensed pros for anything involving gas, permits, or hidden leaks. A good plumbing contractor will save you money in the long run.
Don't be the Reddit story where "my friend installed it for free" turns into "how do I fix this disaster?" We see these stories daily at Homeplexi—and the repair costs are always higher than doing it right the first time.
Related Articles:
Need a licensed plumber? Get 3 Free Quotes →
Data sourced from 765 Reddit posts across 23 home improvement communities, March 2024, plus All quotes are real homeowner experiences from r/Plumbing, r/HomeImprovement, and r/homeowners.
Need Professional Help?
Homeplexi connects you with vetted contractors, helps you compare quotes, and manages your entire home improvement project in one place.
Get Started Free →The Homeplexi editorial team consists of licensed contractors, home inspectors, and consumer protection experts who provide research-backed guidance for homeowners. All content is fact-checked and cited from authoritative industry sources.
Important Safety Disclaimer
Please read this carefully before following any advice:
- Always prioritize safety: Wear appropriate protective equipment (safety glasses, gloves, etc.) when performing any home maintenance or repair work.
- Know your limits: If you're not confident in your ability to safely complete a task, hire a licensed professional. This is especially important for electrical, gas, plumbing, and structural work.
- Verify all information: The guidance provided here is based on community discussions and general knowledge. Always double-check any advice with multiple reliable sources or a licensed professional.
- Follow local codes: Building codes, electrical codes, and plumbing codes vary by location. Ensure any work complies with your local regulations and obtain necessary permits.
- Turn off power/water/gas: Before working on electrical, plumbing, or gas systems, always shut off the relevant utilities at the source.
- For emergencies: If you have a gas leak, electrical fire, major water leak, or other emergency, evacuate immediately and call emergency services (911) and your utility company.
Liability: Homeplexi provides information for educational purposes only. We are not responsible for any injury, property damage, or losses resulting from following any guidance or advice provided through this platform. Use all information at your own risk.
When in doubt, always consult a licensed, insured professional contractor. Homeplexi can help you find qualified professionals in your area.
Found this helpful? Share with others:
Related Articles
How to Lower Electric Bills: Proven Strategies That Actually Work When Basic Tips Fail
Electric bills climbing higher than expected despite energy-saving efforts
Electrical Outlet Not Working: DIY Fixes vs. When to Call an Electrician
Knowing when it's safe to DIY vs. hiring a pro
Home Repair Priorities: The 4-Quadrant System for Deciding Which Fixes Come First (When You Can't Afford Everything)
Homeowners overwhelmed by multiple needed repairs but limited budget, unsure which repairs to tackle first