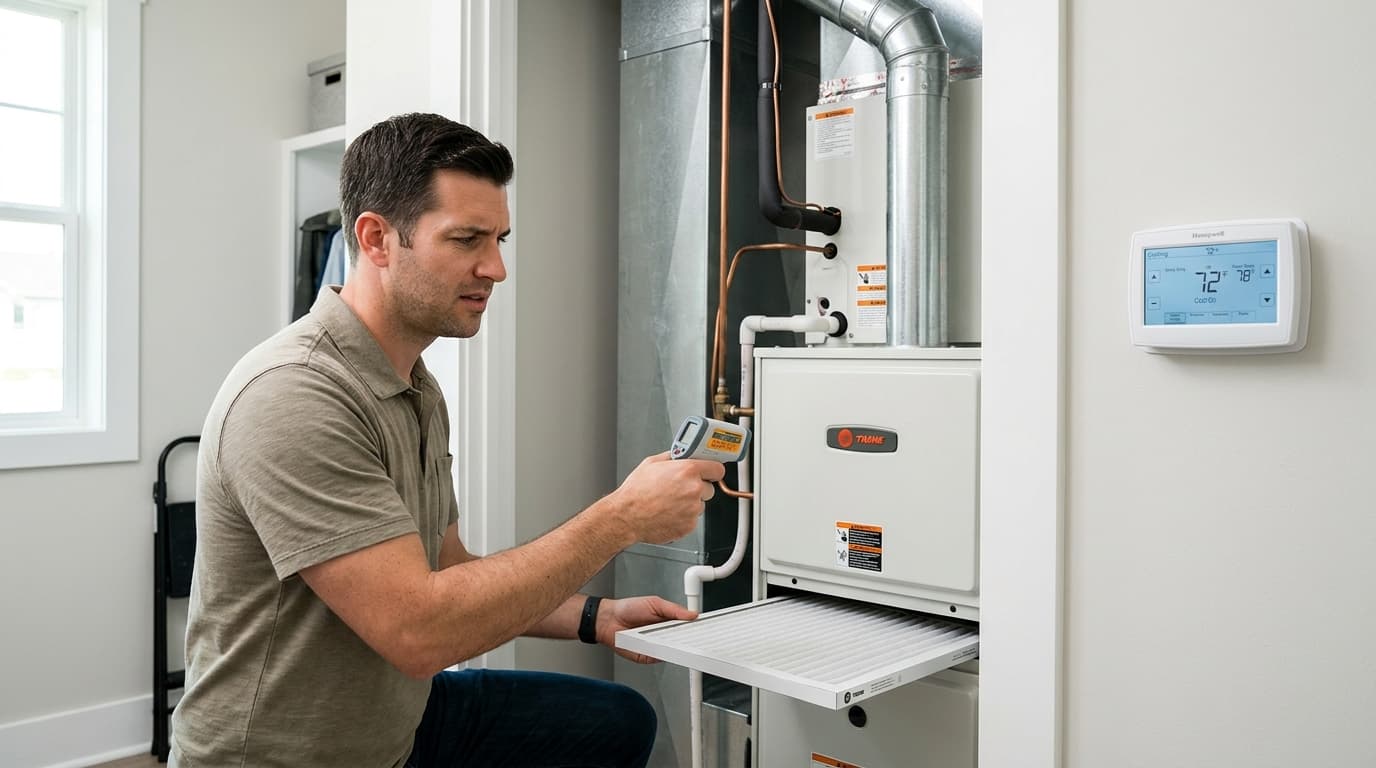
It's 2 PM on the hottest day of summer. You walk into your house expecting sweet, cool relief. Instead, you're hit with a wall of stagnant, warm air. Your heart sinks. Your HVAC not cooling the house is the last thing you need right now. The temperature inside feels almost as unbearable as outside, and you're already dreading the potential repair costs.
Before you panic, take a deep breath. Don't call the first HVAC contractor you find and pay weekend or emergency rates just yet. Take time to find a reliable contractor who can properly diagnose the issue. Many cooling issues have simple solutions. Homeowners can often tackle them in just a few minutes. In fact, up to 80% of HVAC service calls could be avoided with basic troubleshooting.
Most "emergency" calls turn out to be simple fixes. In fact, 64% of cooling complaints are resolved without replacing any parts. Just adjustments and cleaning do the trick. Our data shows that homeowners who troubleshoot first save an average of $150–300 per service call. Let's walk through the five most common culprits so you can get comfortable again without breaking the bank.
Why Your HVAC System Might Not Be Cooling
When your HVAC is not cooling properly, the cause usually falls into one of several categories. These range from simple DIY fixes to problems requiring professional attention:
- Restricted airflow preventing cool air from circulating
- Electrical problems stopping the system from running
- Dirty components reducing efficiency and cooling capacity
- Low refrigerant levels (requires professional service)
- Thermostat malfunctions sending wrong signals to your system
- Frozen evaporator coils blocking normal operation
- Capacitor failures preventing motors from starting
The good news? Most of these are either quick DIY fixes or easy to diagnose yourself. Understanding what to look for can mean the difference between a five-minute fix and an expensive service call.
Understanding Your HVAC System Components
Before diving into troubleshooting, it helps to understand the basics. Your HVAC system has several key parts working together.
Indoor Unit (Air Handler):
- The evaporator coil absorbs heat from your home's air
- The blower motor circulates air through your ductwork
- The air filter protects components from dust and debris
Outdoor Unit (Condenser):
- The compressor pumps refrigerant through the system
- Condenser coils release heat outside
- A fan helps dissipate heat from the coils
Thermostat:
- Acts as the brain of your system
- Monitors indoor temperature and humidity levels
- Controls fan speeds and operating modes
Ductwork and Vents:
- Distributes cooled air throughout your home
- Returns warm air back to the system for cooling
- Must be properly sealed and insulated for efficiency
When any of these components malfunction or become obstructed, your HVAC not cooling issue begins. Let's explore the most common problems and their solutions.
1. Check Your Air Filter First
This is the #1 cause of HVAC cooling problems — and the easiest to fix. A dirty, clogged air filter restricts airflow through your system. This forces it to work harder while cooling less effectively. When airflow is severely restricted, your system may shut down entirely. This protective shutdown often confuses homeowners. They think the system is broken when it's actually protecting itself.
Why Air Filters Matter So Much
Your air filter serves multiple critical functions:
- Protects internal components from dust and debris damage
- Maintains proper airflow for efficient cooling
- Improves indoor air quality by trapping pollutants
- Prevents ice formation on evaporator coils
When filters become clogged, problems cascade through your system. Reduced airflow causes your evaporator coil to get too cold. Condensation freezes instead of draining away. This ice further blocks airflow. It creates a vicious cycle that ends with your HVAC system not cooling at all.
What to do:
- Locate your air filter (usually near the air handler or return air vent)
- Remove and inspect it — hold it up to the light
- Replace immediately if you can't see light through it
- Check monthly during heavy-use seasons
- Note the filter size for future purchases (printed on the filter edge)
- Consider upgrading to higher MERV-rated filters for better air quality
Filter Replacement Schedule:
- Basic fiberglass filters: Replace every 30 days
- Pleated filters: Replace every 60–90 days
- High-efficiency filters: Replace every 6–12 months
- Homes with pets: Replace 50% more frequently
- Dusty environments: Check filters every 2–3 weeks
Pro tip: Keep spare filters on hand. A $5–20 filter replacement can save you hundreds in emergency service calls. Set phone reminders or use smart home apps to track replacement schedules.
Signs Your Filter Needs Immediate Attention:
- Visible dust accumulation on vents
- Increased dust throughout your home
- Higher than normal energy bills (learn more about reducing home repair costs)
- System runs constantly without cooling effectively
- Unusual odors when system operates
- Ice formation on indoor unit
2. Verify Your Thermostat Settings
It sounds obvious. But thermostat issues cause more service calls than you'd expect. Someone might have accidentally bumped the controls. Or the thermostat itself could be malfunctioning.
Quick thermostat checklist:
- Set to "COOL" mode (not heat, auto, or off)
- Temperature set lower than current room temperature (at least 5 degrees)
- Fan setting should be on "AUTO" or "ON"
- Check the display — if it's blank, you may need new batteries
- Look for error codes or unusual displays
- Verify the schedule on programmable thermostats
- Check for "vacation" or "hold" settings that might override normal operation
Common Thermostat Problems:
Dead or Weak Batteries: Replace batteries even if the display looks normal. Weak batteries can cause erratic behavior before the screen goes blank. Use high-quality alkaline batteries. Replace them annually as preventive maintenance.
Incorrect Placement: Thermostats near heat sources give false readings. Lamps, electronics, and sunny windows are common culprits. This causes your HVAC not cooling when it should be. Ideal placement is on an interior wall, away from direct sunlight.
Dirty Sensors: Dust inside the thermostat can affect temperature readings. Carefully remove the cover. Use compressed air to clean internal components. Never use liquids or harsh chemicals.
Programming Errors: Programmable thermostats save energy but can confuse homeowners. Common mistakes include:
- Setting cooling temperatures too high during occupied hours
- Forgetting to adjust schedules for season changes
- Accidentally activating "vacation" modes
- Creating conflicting schedule settings
Smart Thermostat Troubleshooting:
Modern smart thermostats add convenience but introduce new issues:
- Wi-Fi connectivity problems preventing remote adjustments
- Firmware updates that reset custom settings
- Learning algorithms that need time to adapt
- Geofencing issues causing unexpected temperature changes
Check the manufacturer's app for error messages or connectivity issues. Many problems can be resolved through the app alone.
3. Check Your Circuit Breakers and Electrical Connections
Electrical issues are the second most common cause when an HVAC system stops cooling. Your AC uses two separate breakers. One powers the indoor unit. The other powers the outdoor condenser. There may also be disconnect switches and fuses that can interrupt power.
What to check:
- Locate your electrical panel and find HVAC-related breakers
- Look for tripped breakers (switch in middle position or fully "OFF")
- Reset any tripped breakers by switching fully OFF, then back ON
- Check the outdoor disconnect switch near your condenser unit
- Inspect visible wiring for damage or loose connections
- Look for blown fuses in older disconnect boxes
Understanding Your HVAC Electrical System:
Your cooling system requires significant electrical power:
- 240-volt circuit for the outdoor condenser unit
- 120-volt circuit for the indoor air handler
- 24-volt control circuit for thermostat operation
When any circuit fails, your HVAC system isn't cooling properly. The 240-volt outdoor circuit trips most often. The compressor draws high startup current, which can overload the breaker.
Common Electrical Problems:
Capacitor Failure: Capacitors help motors start and run efficiently. When they fail, you might hear:
- Humming without the fan starting
- Clicking sounds from the outdoor unit
- System starting then immediately stopping
Contactor Issues: The contactor is an electrical relay controlling power to the compressor. Signs of failure include:
- Chattering or buzzing sounds
- System not responding to the thermostat
- Intermittent cooling problems
Safety note: If a breaker trips again immediately after resetting, stop. Call a professional. This indicates a serious electrical problem such as:
- Short circuit in wiring
- Failed compressor drawing excessive current
- Damaged fan motor
- Water intrusion causing electrical faults
Preventive Electrical Maintenance:
- Annual inspection of all electrical connections
- Tightening terminals to prevent arcing
- Checking voltage levels for proper operation
- Testing capacitors before failure occurs
- Cleaning contactors to ensure proper operation
4. Inspect Your Outdoor Condenser Unit
Your outdoor unit needs proper airflow to release heat. When it's blocked or dirty, your HVAC system can't cool your home efficiently. ### Outdoor unit inspection:
- Clear debris around the unit (leaves, grass clippings, branches)
- Maintain 2–3 feet of clearance on all sides
- Check if the fan is running when the system is on
- Look for ice buildup on the refrigerant lines
- Ensure the unit is level and not sinking into the ground
- Listen for unusual noises indicating mechanical problems
- Check for bent fins on the condenser coils
Deep Cleaning Your Condenser:
Proper condenser maintenance goes beyond basic debris removal.
Step-by-Step Cleaning Process:
- Turn off power at the disconnect switch and breaker
- Remove the fan grille carefully (watch for attached wiring)
- Clear debris from inside the unit
- Straighten bent fins using a fin comb
- Apply coil cleaner following manufacturer directions
- Gently hose down the coils from inside out (never use a pressure washer)
- Clean the fan blades with a damp cloth
- Check and tighten all visible connections
- Replace the grille and restore power
Common Condenser Problems:
Refrigerant Leaks: Signs include:
- Hissing or bubbling sounds
- Ice formation on refrigerant lines
- Oily residue near connections
- Gradual loss of cooling capacity
Fan Motor Issues: Symptoms include:
- Fan not spinning despite system running
- Intermittent fan operation
- Grinding or squealing noises
- Excessive vibration
Compressor Problems: Warning signs:
- Hard starting (repeated attempts to start)
- Tripping breakers frequently
- Unusual noises (knocking, grinding)
- System running but not cooling
Warning: If you see ice on your system, turn it off immediately. Let it thaw completely before restarting. Ice formation usually indicates:
- Low refrigerant levels
- Restricted airflow
- Dirty evaporator coils
- Thermostat set too low
Seasonal Condenser Maintenance:
Spring Startup:
- Remove winter covers
- Clear accumulated debris
- Check refrigerant line insulation
- Test system operation before hot weather arrives
Summer Operation:
- Monthly debris checks
- Monitor for unusual sounds
- Keep grass trimmed around unit
- Avoid placing grills or fire pits nearby
Fall Shutdown:
- Final cleaning before winter
- Consider a breathable cover for protection
- Document any issues for spring service
5. Examine Your Vents and Ductwork
Blocked or closed vents can significantly impact cooling performance. They can even damage your system over time. Many homeowners don't realize that closing vents in unused rooms actually increases energy costs. It also strains the system.
Vent and ductwork checklist:
- Open all vents throughout your home (closing vents doesn't save energy)
- Remove furniture, curtains, or objects blocking airflow
- Check for loose or disconnected ducts in accessible areas
- Look for obvious duct damage (holes, crushing, or disconnections)
- Ensure return air vents aren't blocked
- Inspect vent dampers to ensure they're fully open
- Clean vent covers of dust and debris
Understanding Airflow Dynamics:
Your HVAC system is designed for specific airflow rates. When vents are closed or blocked:
- Static pressure increases in the ductwork
- The blower motor works harder, consuming more energy
- Cool air leaks through duct connections
- Some rooms become too cold while others stay warm
- The system cycles more frequently, reducing lifespan
Common Ductwork Problems:
Leaky Ducts: According to Energy Star, typical homes lose 20–30% of conditioned air through duct leaks. Signs include:
- Rooms that are difficult to cool
- Excessive dust despite filter changes
- Higher than expected energy bills
- Visible gaps at duct connections
Inadequate Insulation: Ducts running through unconditioned spaces need proper insulation. Without it:
- Cool air warms before reaching rooms
- Condensation forms, promoting mold growth
- Energy efficiency drops significantly
Poor Duct Design: Some homes have inherent ductwork problems:
- Undersized ducts restricting airflow
- Too many bends reducing air velocity
- Long runs to distant rooms
- Inadequate return air pathways
DIY Ductwork Improvements:
Sealing Visible Leaks:
- Use mastic sealant or metal tape (never duct tape)
- Focus on connections and joints
- Seal around vent boots where they meet drywall
- Check flexible duct connections carefully
Improving Insulation:
- Add insulation to exposed ducts in unconditioned spaces
- Ensure vapor barriers face the correct direction
- Replace damaged or compressed insulation
- Consider professional assessment for major upgrades
Quick test: Hold a piece of tissue paper near each vent. You should feel strong airflow that moves the paper noticeably. Weak airflow indicates:
- Blocked or closed dampers
- Disconnected or leaking ducts
- Undersized ductwork
- Filter or coil restrictions
Room-by-Room Airflow Assessment:
Check each room systematically:
Bedrooms:
- Closed doors restrict return airflow
- May need door undercuts or transfer grilles
- Check for furniture blocking vents
Kitchen:
- Grease can accumulate on vents
- Appliances may block airflow
- Consider heat load from cooking
Bathrooms:
- Exhaust fans may compete with HVAC airflow
- Check for proper ventilation to prevent moisture issues
- Small spaces may cool too quickly
Living Areas:
- Large spaces may need multiple vents
- Check for blocked returns behind entertainment centers
- Ceiling fans improve air circulation
Advanced Troubleshooting Tips
When basic checks don't resolve your HVAC not cooling issue, these advanced diagnostics can help.
Temperature Testing:
Use a digital thermometer to measure:
- Supply air temperature at vents (should be 15–20°F cooler than room temp)
- Return air temperature at the intake
- Temperature drop across the evaporator coil
- Outdoor ambient temperature affecting system performance
Abnormal readings indicate:
- Low refrigerant charge
- Dirty coils reducing heat transfer
- Airflow restrictions
- Failing compressor
System Performance Indicators:
Cooling Cycles:
- Normal cycles last 15–20 minutes
- Short cycling (under 10 minutes) indicates problems
- Continuous running suggests an undersized system or major issues
Energy Consumption:
- Compare current bills to previous years
- Sudden increases indicate efficiency losses
- Track daily usage patterns for anomalies
Humidity Levels:
- Properly functioning AC removes humidity
- High indoor humidity despite cooling indicates:
- Oversized system short-cycling
- Drainage problems
- Incorrect fan speeds
When to Call a Professional
These five checks solve many cooling problems. But some issues require professional HVAC expertise. They may also void warranties.
Call a pro immediately if you notice:
- Strange sounds like grinding, squealing, or banging
- Electrical burning smells or sparks
- Refrigerant leaks (hissing sounds or ice buildup)
- Repeated breaker tripping after reset
- No improvement after checking all five items above
- Water leaks around the indoor unit
- Significant temperature differences between rooms
Professional-only repairs include:
- Refrigerant recharging (requires EPA certification)
- Electrical component replacement
- Compressor or motor repairs
- Ductwork modifications or major repairs
- Control board diagnostics
- Leak detection and repair
- System rebalancing
Cost Considerations:
Understanding typical repair costs helps you make informed decisions.
Minor Repairs ($50–200):
- Capacitor replacement
- Contactor replacement
- Basic electrical repairs
- Drain line clearing
Moderate Repairs ($200–600):
- Fan motor replacement
- Control board replacement
- Refrigerant recharge (including leak repair)
- Extensive electrical work
Major Repairs ($600–2000+):
- Compressor replacement
- Evaporator coil replacement
- Extensive refrigerant leak repairs
- Major ductwork modifications
Choosing the Right Contractor:
Homeplexi recommends getting multiple contractor quotes and considering:
- Proper licensing and insurance
- Manufacturer certifications
- Customer reviews and ratings
- Detailed written estimates
- Warranty offerings
- Response time and availability
Preventing Future Cooling Problems
Regular maintenance prevents most HVAC not cooling emergencies. Properly maintained systems last 40% longer. They average 18 years versus 13 years for neglected units. They also use 20% less energy and avoid 89% of emergency breakdowns.
Essential Maintenance Tasks:
Monthly:
- Check and replace filters
- Clear debris from outdoor unit
- Test thermostat operation
- Listen for unusual sounds
Seasonally:
- Schedule a professional tune-up before cooling season
- Clean condenser coils
- Check refrigerant line insulation
- Test all safety controls
Annually:
- Professional inspection of all components
- Ductwork assessment
- Electrical connection tightening
- Efficiency testing
Creating a Maintenance Schedule:
Use these tools to stay on track:
- Phone reminders for filter changes
- Seasonal calendar alerts
- Maintenance logs tracking service dates
- Energy usage monitoring
- Homeplexi's contractor management platform
Don't Let HVAC Problems Ruin Your Summer
When your HVAC not cooling properly, these five simple checks can save you time, money, and discomfort. Start with the air filter. Work your way through each item. You might be surprised how often the solution is simpler than expected. Homeowners who understand their systems make better decisions and avoid unnecessary expenses.
Remember: Regular maintenance prevents most cooling problems. Schedule annual tune-ups. Change filters regularly. Address small issues before they become major repairs. A well-maintained system cools better, uses less energy, and lasts years longer.
If you've tried these steps and your system still isn't cooling, it's time to bring in the professionals. Don't wait until a small problem becomes a major breakdown. This is especially true during peak summer heat, when HVAC contractors are busiest and rates are highest.
Taking a proactive approach puts you in control. You'll know when a problem is a simple DIY fix. You'll also know when it's time to call for professional help. This knowledge saves money, prevents discomfort, and extends the life of your HVAC investment.
Related Articles:
- HVAC Troubleshooting: Real Stories
- How to Find a Reliable Contractor
- Questions to Ask Before Hiring a Contractor
- 12 Critical Contractor Red Flags
Need help finding a reliable contractor? Homeplexi connects you with vetted professionals, helps you compare quotes, and manages your entire home improvement project in one place. Get started free →
Need Professional Help?
Homeplexi connects you with vetted contractors, helps you compare quotes, and manages your entire home improvement project in one place.
Get Started Free →The Homeplexi editorial team consists of licensed contractors, home inspectors, and consumer protection experts who provide research-backed guidance for homeowners. All content is fact-checked and cited from authoritative industry sources.
Important Safety Disclaimer
Please read this carefully before following any advice:
- Always prioritize safety: Wear appropriate protective equipment (safety glasses, gloves, etc.) when performing any home maintenance or repair work.
- Know your limits: If you're not confident in your ability to safely complete a task, hire a licensed professional. This is especially important for electrical, gas, plumbing, and structural work.
- Verify all information: The guidance provided here is based on community discussions and general knowledge. Always double-check any advice with multiple reliable sources or a licensed professional.
- Follow local codes: Building codes, electrical codes, and plumbing codes vary by location. Ensure any work complies with your local regulations and obtain necessary permits.
- Turn off power/water/gas: Before working on electrical, plumbing, or gas systems, always shut off the relevant utilities at the source.
- For emergencies: If you have a gas leak, electrical fire, major water leak, or other emergency, evacuate immediately and call emergency services (911) and your utility company.
Liability: Homeplexi provides information for educational purposes only. We are not responsible for any injury, property damage, or losses resulting from following any guidance or advice provided through this platform. Use all information at your own risk.
When in doubt, always consult a licensed, insured professional contractor. Homeplexi can help you find qualified professionals in your area.
Found this helpful? Share with others:
Related Articles
How to Lower Electric Bills: Proven Strategies That Actually Work When Basic Tips Fail
Electric bills climbing higher than expected despite energy-saving efforts
Electrical Outlet Not Working: DIY Fixes vs. When to Call an Electrician
Knowing when it's safe to DIY vs. hiring a pro
Home Repair Priorities: The 4-Quadrant System for Deciding Which Fixes Come First (When You Can't Afford Everything)
Homeowners overwhelmed by multiple needed repairs but limited budget, unsure which repairs to tackle first